
- Internet
- 11.09.2018
- EN
Manuel Schnitger: Pimp my page!
written by Manuel Schnitger, 21. December 2010
– the definitive guide to users’ satisfaction – ;)
In this first article of my blog I’d like to point out the out of the box functionality of the Open Text Management Server that helps authors & editors regarding their editorial work. Over the years RedDot implemented lots of features that support users in the SmartEdit work but there are possibly some projects that could be improved ;) Therefore I’d like to give an overview of the features of the current version (Management Server 10.1).
Form RedDot
The form RedDot opens a form that contains all the elements of a page in just one big form. That means the number of clicks the editor has to do is limited to just one click. This saves time as the author is not forced to open each elements by clicking on the corresponding RedDot.
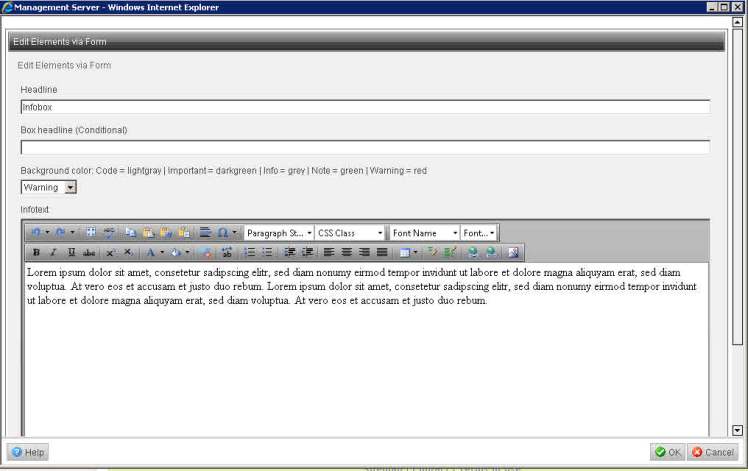
Figure 1: Elements can be edited via form
Questions:
- Is it a good idea just to put the Form RedDot in each content class the is used by the authors?
Well, I don’t know of any reason not to do so. - Is it a good idea to put in a Form RedDot and inserting/providing no other RedDots for specific elements?
That really depends on the number of elements and the type of the elements. If there are 10 text elements in the page and the author just wants to edit one of these elements, then it’s probably faster just to click on the RedDot for this specific element than using the Form RedDot and loading the text editor 10 times. - Hint: When using the Form RedDot ALL elements of the content class are displayed into the form. To avoid confusion elements with no editorial relevance should be excluded by using the option “Do not use in form”.

Figure 2: Option "Do not use in form"
Child Elements
If the RedDot that opens just one element isn’t enough (because you want to edit more than one element) and the Form RedDot is too much (because you don’t want to edit all elements of the page), then the option “child element” might be a good idea. With this option elements which have an editorial relation (e.g. image + caption + position of the image) can be edited in one dialogue.
Note: Not all elements can be child elements of other elements.

Figure 3: Child element definition in SmartTree
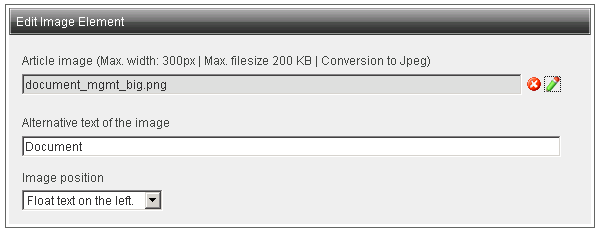
Figure 4: Child element in SmartEdit
Blind images & blind texts
In order to provide an overview about how the page will look after all elements hold content, the use of blind images and blind texts is a good idea. If the size of images is predefined at the element you can easily even create blind images with the same width and height as the original ones. If not then the author at least gets a basic idea how the page will look like. There are many resources in the web which provide blind images and blind texts.
Hints:
- A lot of people (at least in Germany) use the “lorem ipsum” blind text which is ok. But a better idea is to use blind texts in the language you work with, because the lenght of the words and corresponding to that the presentation of the text differs from language to language.
- Don’t just insert the same blind text in all text elements. A teaser text normally has less text than an article text. Improve the user experience by using blind images and texts which meet the real life appearance.
Template Preview images
Preview images for templates can ideally be used to give the author a first impression of the provided templates. As the images are automatically scaled to 32 by 32 pxx don’t even try to work with screenshots of the real articles of the project. Better is to just use a simple graphic software and to create a very simplified visualization of the template. I normally use Powerpoint to create the shapes and Screenpresso (www.screenpresso.com) to take a screenshot of the “template”. If you plan to create more than one project and therefore have the need to create lots of preview images then a kind of a element librariy might be a good idea.
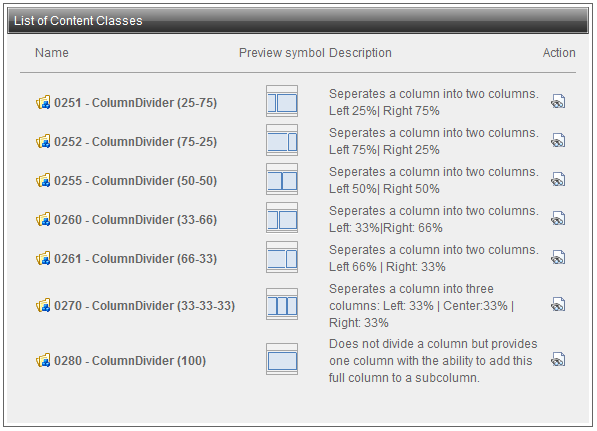
Figure 5: Preview images for content classes
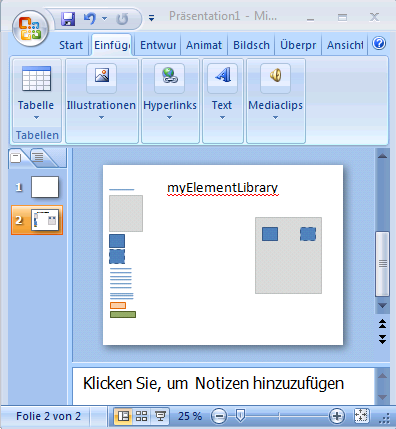
Figure 6: Sample of an element library
Preassignment of content classes
If the author wants to create new pages, it makes sense just to provide those content classes which are meaningful in this specific context. This is achieved by preassigning content classes to the structural elements like List, Container, and anchor. After you have made this preassignments, the editor will only be offered those content classes that you have predefined. This achieves two goals: First, the editor can select the correct content class more quickly because only a small subset of all content classes is available. Second, you can be sure that only those content classes will be used that are appropriate for the design at that point.
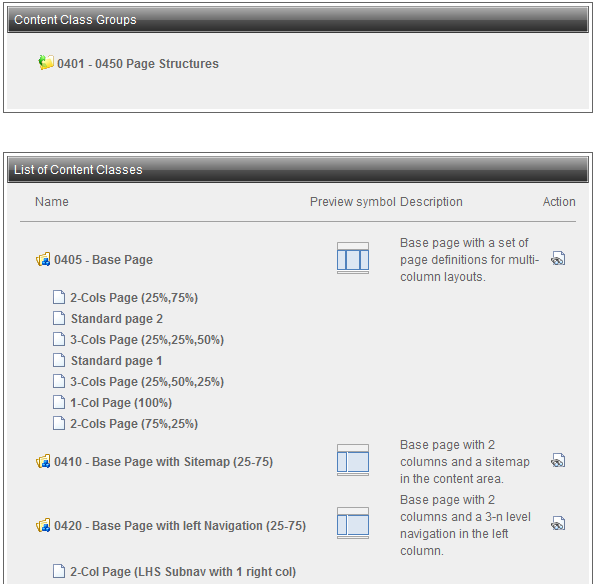
Figure 6: Content class preassignment
SmartEdit Descriptions
Most elements do have a field called “SmartEdit Description”. Text that is entered in this field will be displayed as a tool tip when the mouse cursor is moved over the corresponding RedDot and is used as the headline of the elements within the Form. When the “SmartEdit description” is empty, the name of the element (e.g.: optPosPanelBig) is displayed as the tool tip as well as the headline within the form. The SmartEdit description is inteded to provide some extra information to the user. So when an image element has the options “convert to Jpeg” + “maximum filesize=200kb” + “max width=200px”, then is could be helpful for the author to see a tool tip like this: [Image will be converted into Jpeg|max. uploadable file size:200kb|image will be scaled to a max. width of 200px.] This information avoids confusion and can be inserted into the SmartEdit description field in a few seconds.

Figure 7: SmartEdit description for elements
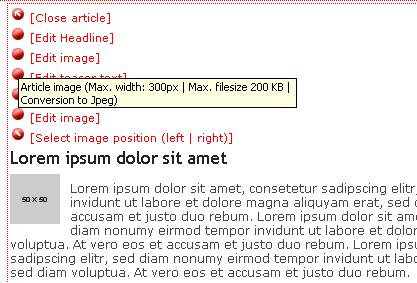
Figure 8: SmartEdit description text as a tool tip
DropZones and DragAreas for images, container and lists
DropZones enable authors to drag images or media files such as Excel spreadsheets or other formats onto a DropZone of the corresponding element and fill the element without the need to click on the RedDot of this element. Since Management Server version 10.1 Drag&Drop is also available for list elements and containers. Things you can do are: Createing pages by dragging a content class onto a DragArea and moving existing pages form one list/container to another.
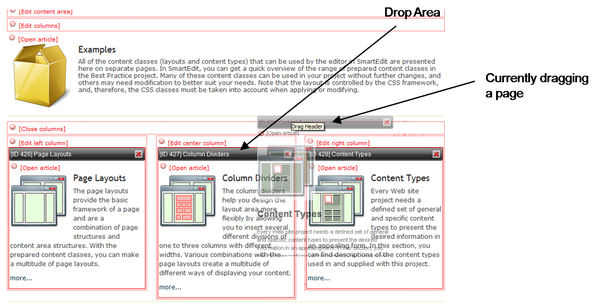
Figure 8: Pages can be added and sorted using DragAreas
Direct Edit
DirectEdit is a function that can be used to make minor changes to texts directly in the page without opening a text editor. It is a fast way to correct typing mistakes or add some text. Text formatting (with the exception of bold, italic, and underline) and inserting images or other text editor functions are not available. You can open the DirectEdit mode for an element by clicking the RedDot while pressing the CTRL key. You save the changes by clicking the element’s RedDot.
Editable areas
To display which area will open when someone clicks on a particular OpenPage RedDot you can use the feature “Editable Areas” which can be found in the general settings of hte project. Once activated this option, a dotted (other styles can be chosen as as well)line appears around the area that is editable when you’d click on this specific RedDot.
Sort order of elements
Last but definetely not least the sort order of elements is one thing that supports efficient work. When the sort order of the elements is not configured it happens that the second element in the form is the media element for the download that is placed at the bottom of the article. In order to really provide the elements in the order they appear on the page, just click on the elements icon shown on the screenshot and sort the elements.
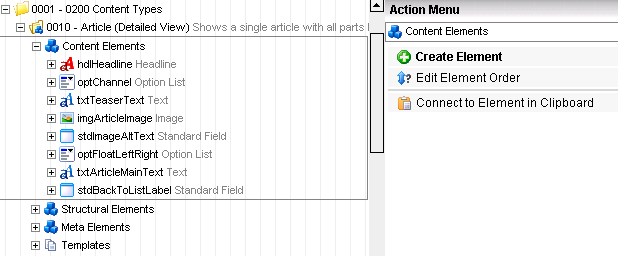
Figure 9: Editing the sort order of elements
Source: Pimp my page!
© copyright 2010 by Manuel Schnitger