
- Internet
- 04.09.2017
- EN
Installing Web Compliance Manager with Management Server (RedDot)
written by Miss Integration, 20. April 2011
Web Compliance Manager is a separate module can be purchased to ensure that your web site meets corporate compliance without spelling errors.
This is a really simple install, and I am sure there are many people out there have implemented this without issues. I am documenting this more for my own benefits, so I don’t have to scratch my head again when doing the installs.
This time I will be installing a Pre Version, as you are probably aware, there are two versions “PRE” and “POST” for WCM. The “PRE” version checks the pages before they are published, while the “POST” version checks against the already published pages/sites. In this example, I will be using the PRE version, and will be installing on the Management (RedDot CMS) Server 10.1 using the Tomcat Server as the server engine.
Firstly, you need to get a license; (as always…) and secondly, you need to download the required software from the Knowledge Center.
Step 3
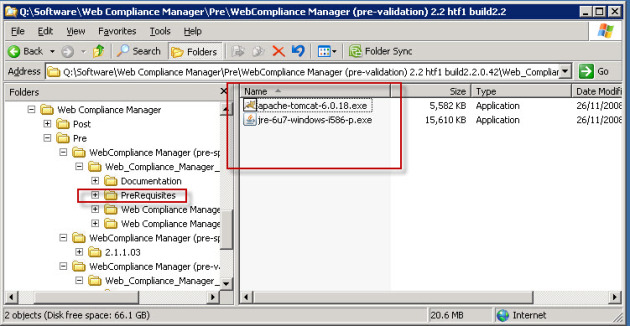
Decide the server engine you are going to use, and get the prerequisites installed. For example, here I need Java and Tomcat. The Installation files are structured very neatly which also comes with software required for prerequisites.
Step 4
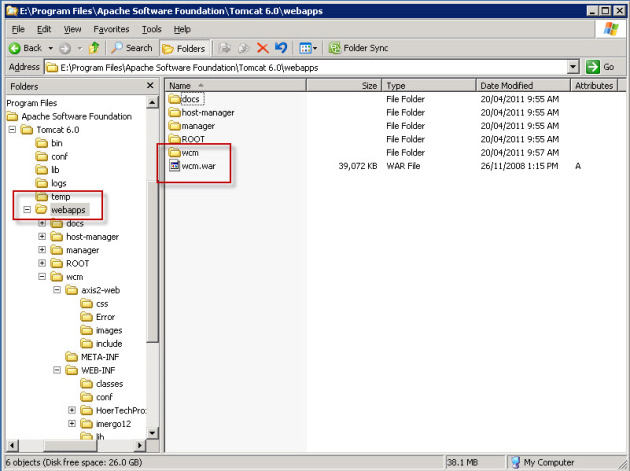
Deploy the wcm.war file. If you are using Tomcat like I am, it is very easy. Simply copy the wcm.war file into the [Tomcat Install Dir]\webapps folder, and restart the Tomcat Service. Once the service is restarted, you will see the WCM folder created under the webapps folder.
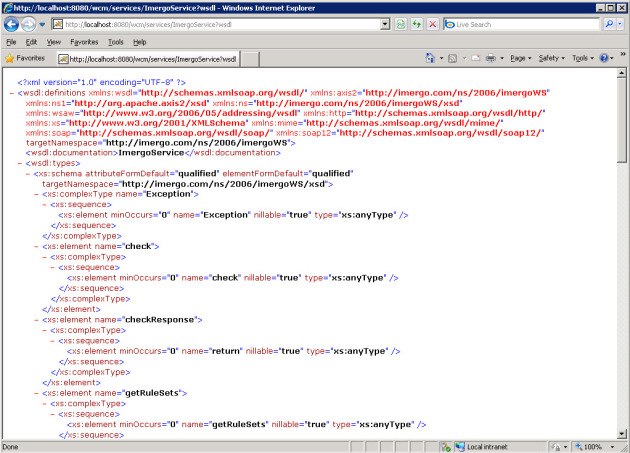
Once the web service is deployed successfully, you should be able to browse to it by visiting the address
http://<Server Name>:<Port>/wcm/services
Step 5
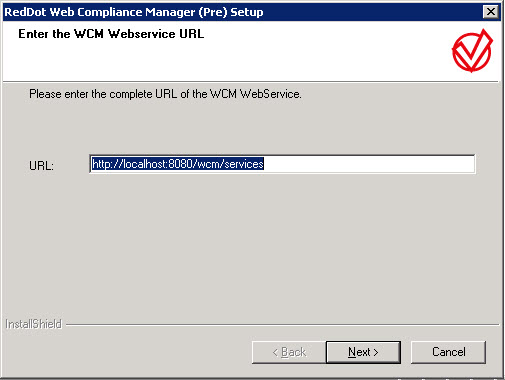
Install the Web Compliance Manager Interface. During this installation, you will need to specify the URL where the Web Service is installed in the previous step.
Step 6
We are pretty well done here, now we just need to configure the Management Server. Note that the configuration here needs to be done for every projects require WCM.
If you are just using the Validation component, you will only need to configure the Project Variants; but if you are also configuring the SpellCheck component, you will need to configure the Language Variants as well.
WCM comes with a few pre-defined rules; however, customized rules can also be developed. ( For more information please check the install manual. )
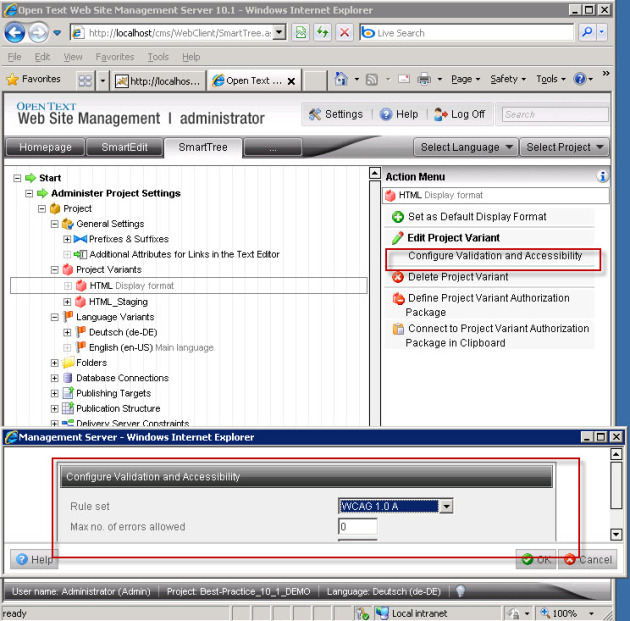
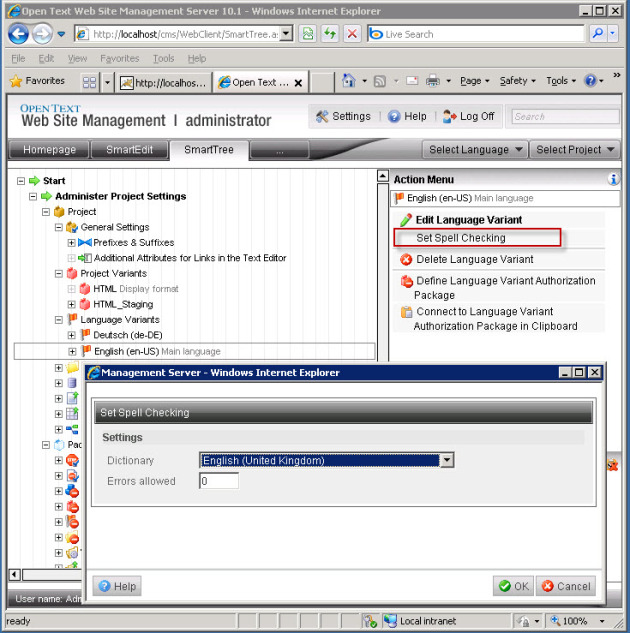
Once these are configured, you should be good to go. Simply select a page and click on the options in the Action Menu. You should see the following results.
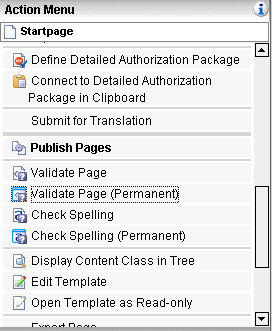
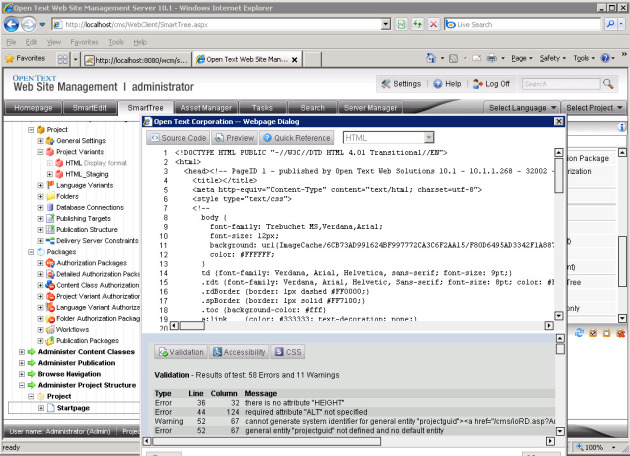
That’s all from me, good luck! :)
Source: Installing Web Compliance Manager with Management Server (RedDot)
© copyright 2011 by Shelly Mao / Miss Integration
Related article:
Web Compliance Manager - WCAG 2.0 Accessibility Prüfung mit OT Web Site Management
Gewusst wie! "Optimierung der Asynchronen Prozesse"