- Internet
- 20.09.2017
- EN
How to Install A RedDot CMS Plug-in
written by Javahand on Tue, 05/11/2010 - 17:04
1. First down the relevant plug-in files.
Open Lounge™ is an easy-to-use business collaborator for RedDot CMS and is free to download.(For demonstration purposes, this tutorial will Open Lounge™ as a sample plug-in.) You can download Open Lounge™ here.
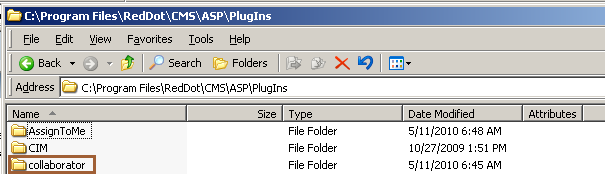
2. Place the downloaded plug-in folder
Unzip or unrar it as needed - into your "/PlugIns/" folder under your RedDot CMS installation folder. It is normally here: "C:\Program Files\RedDot\CMS\ASP\PlugIns". The folder that constitutes Open Lounge™ plug-in is named "collaborator".
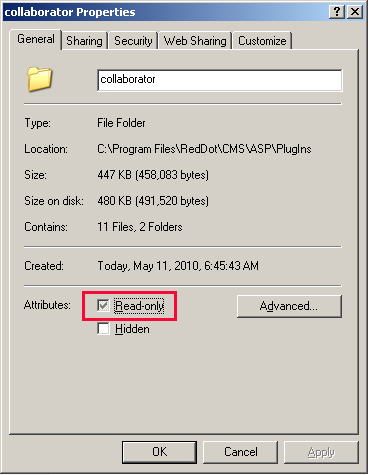
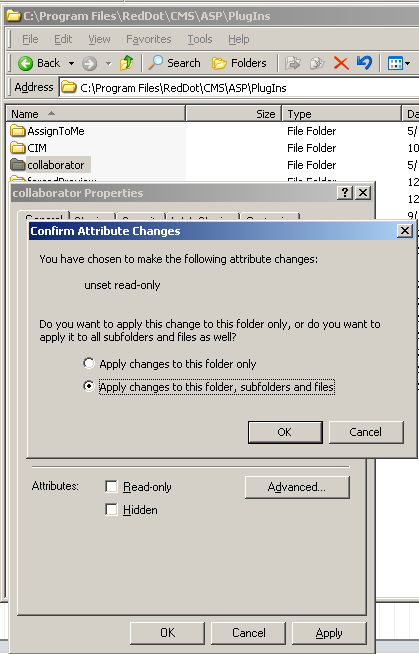
3. In most cases, Windows has set "Read-only" default attribute to collaborator.
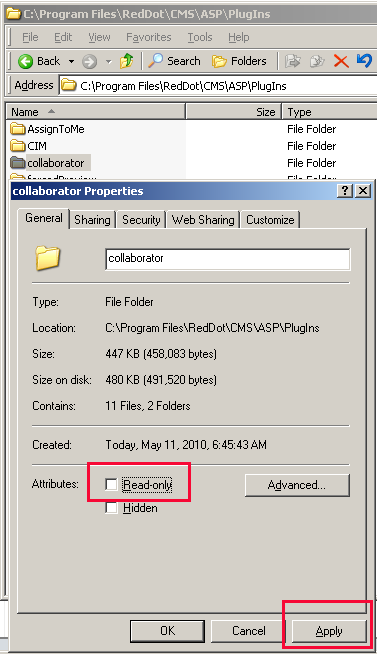
4. Uncheck "Read-only" and hit "Apply"
5. Confirm that you want the change to be applied to sub-folders and files:
6. Above steps should have forced...
"collaborator" folder to inherit "PlugIns" folder's attributes, particularly the "security" permission settings. If for any reason your plug-in does not run later, come back to step 4. And 5. And inspect "collaborator" again and click on the "security" tab. You will have to manually add all users that are permissible to "PlugIns" folder but are denied access to "collaborator" folder. Such discrepancies are the culprit that prevents your plug-in from running in most cases - unless the plug-in itself is buggy.
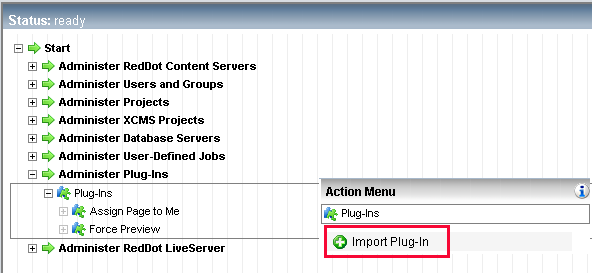
7. Now it's time to log in...
RedDot CMS and browse to Server Manager. Expand "Administer Plug-ins" node and click on "Import Plug-in":
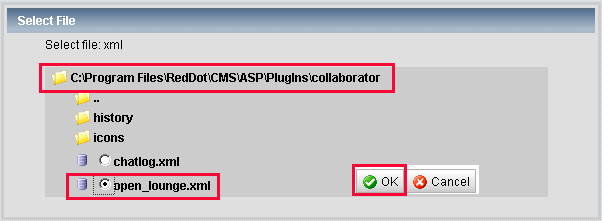
8. Browse to the just placed "collaborator" folder.
All plug-in application settings are contained in a namesake XML file. If you happen to choose a wrong XML file in the folder, plug-in will just fail without any damage to your RedDot CMS:
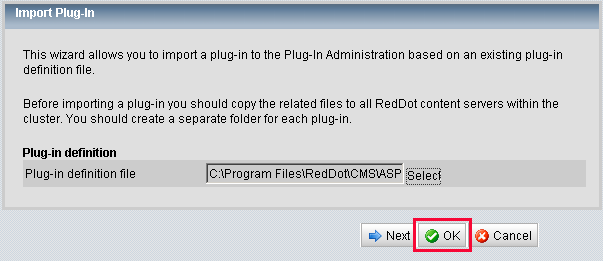
9. Upon importing the proper XML file...
RedDot CMS presets all plug-in settings on basis of the XML file. All you need to do at this moment is to hit the "OK" button:
10. Upon hitting the "OK" button...
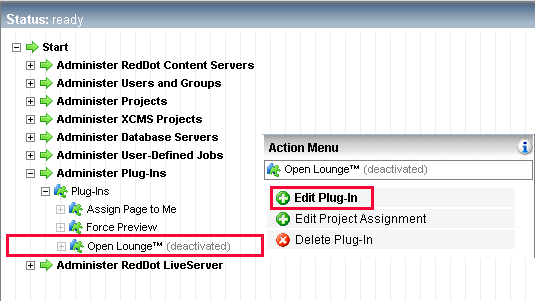
the plug-in is imported into RedDot CMS; however, by default, the imported plug-in is inactive. So you will need to go back to "Administer Plug-ins" and select "Edit Plug-in":
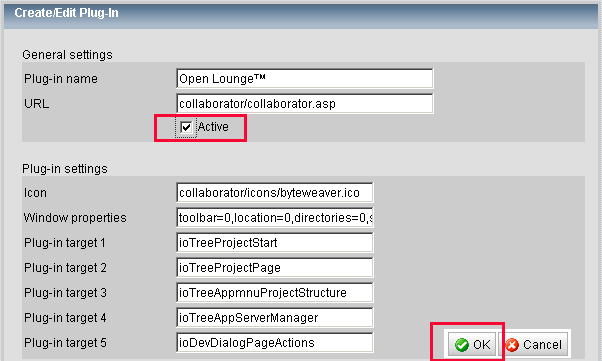
11. Once the editing screen pops up...
check the "Active" box and hit "OK":
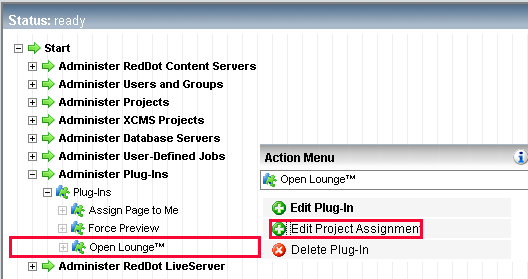
12. Now the plug-in is imported and activated.
However, we are still missing one last step needed for run-time - what are the projects the newly minted plug-in is supposed to work with? To answer that question, we go back to "Administer Plug-ins" node one last time and select "Edit Project Assignments":
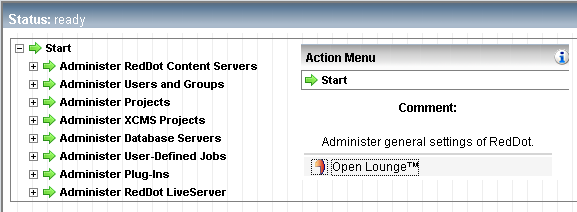
13. Go back to Server Manager...
and select the "Start" node and you will see Open Lounge™ ready to be launched. Open Lounge™ is also available via Administer Project Structure node, Project node under Administer Project Structure and the Action Menu in SmartEdit once a page is opened:
Now it's time to download Open Lounge™ and try the above-outlined steps yourself!
Source: How to Install A RedDot CMS Plug-in
© copyright 2010 by byteweaver [byte.weaver] - n, a digital craftsman